Category

Home Improvement

Category

Three cracked tiles taught me more about roofing than any estimate ever did. I noticed them from the driveway on a Tuesday, waited eight months because nothing was leaking, and by the time I called someone, the underlayment beneath them had been sunbaked for two Florida summers. The tiles were a ten minute fix. The water damage inside was not.

That gap between visible damage and actual damage is where most homeowners lose money. Tile is one of the longest lasting roofing materials you can put on a house, and that longevity tricks people into thinking the roof takes care of itself. It doesn’t. What people call tile roof repair is usually the bill for something that could have been handled a year earlier, and the difference comes down to understanding what tile actually does versus what sits underneath it. If you’re comparing contractors for the work itself, it helps to look at what professional tile roof installation actually involves beyond laying tiles in neat rows.

Here’s the part that changes how you look at your own roof: the tiles are not the waterproof layer. They’re the shield. The barrier doing the real work is underneath them.

What’s Actually Holding Back the Rain

Under every field of tile sits a secondary water barrier, usually an underlayment membrane, and it is the component that keeps water out of your house. Tiles shed the bulk of the rain and take the sun damage so the membrane doesn’t have to. When a tile slips or cracks, the membrane underneath is suddenly exposed to UV, wind driven rain, and temperature swings it was never meant to handle alone.

That’s why a roof can look fine from the street and still be failing. You’re seeing the shield, not the barrier. Contractors who do this work professionally will tell you the same thing: the tile outlives the underlayment by a wide margin, and a lot of “tile roof repair” jobs are really membrane jobs with a tile reinstallation on top.

So when you’re staring up at your roof, the question isn’t “are the tiles pretty?” It’s “how old is what’s under them?”

A Maintenance Calendar I’d Actually Follow

Most roof care advice is vague enough to ignore. Here’s what I’d put on my own calendar.

When What to do Why it matters
Twice a year Walk the perimeter with binoculars. Look for slipped, cracked, or missing tiles and any tile that’s no longer sitting flush. You catch exposed membrane before water reaches the deck.
After every major storm Check the ground under downspouts and along the base of walls for tile fragments. Broken tile in the yard means broken tile on the roof.
Once a year Clear valleys, gutters, and any place debris collects. Piled debris traps moisture and blocks drainage.
Every few years Have someone qualified inspect the underlayment condition and the flashing at penetrations. This is the layer that actually fails first.

Notice nothing on that list involves climbing onto the roof in flip flops. Tile is brittle, the surface is slick when it’s wet, and walking on it wrong cracks tiles that were perfectly fine. Watch from the ground, then pay someone to go up.

Why Tile Roofs Fail Early (It’s Rarely the Tile)

When a tile roof fails before its time, the culprit is almost always one of a few things, and none of them are the clay or concrete itself.

  • Bad flashing at penetrations. Vents, chimneys, and skylights are where water gets in first, because that’s where the roof has seams and transitions.
  • Cheap or incorrectly installed underlayment. This is the single biggest factor in how long your roof actually lasts.
  • Foot traffic damage. Satellite installers, solar crews, and well meaning homeowners crack tiles and don’t replace them.
  • Debris and tree contact. Limbs rubbing a roof wear through the surface over years.

Here’s a comparison worth knowing if you’re choosing materials or evaluating what you already have.

Material Relative weight Typical lifespan Your main risk
Clay tile Heavy Decades Brittleness and cracking
Concrete tile Heavy Decades Color fade and cracking
Asphalt shingle Light Shorter Granule loss and wind

A tile roof adds real structural load, and that’s a design consideration, not an afterthought. Local building codes exist for a reason, and the National Fire Protection Association maintains the codes and standards many jurisdictions adopt, including fire and wind provisions that affect roof assemblies. If you’re retrofitting tile onto a roof that had shingles, get someone to check whether the structure was built for the weight before you fall in love with a color swatch.

Repair Now or Replace Later

This is the decision most homeowners get wrong, because they frame it as a cost question when it’s really a timing question.

Repair makes sense when the damage is isolated: a handful of cracked tiles, one bad flashing detail, a localized leak you caught early. Patch work is cheap relative to the alternative, and if the underlayment in that area is still sound, you’re done.

Replacement starts making sense when the underlayment is near the end of its service life across the whole roof, when you’re seeing multiple leaks in different areas, or when a repair estimate creeps toward a meaningful fraction of a full replacement. That last one is the practical trigger. If you’re spending serious money to fix one section of a roof that’s uniformly old, you’re paying twice for the same problem.

My take: when the underlayment is the issue, stop patching tiles. You’re renovating a facade.

The Three Questions That Save You Money

Before you sign anything, ask these.

  1. What’s the condition of the underlayment? If the answer is a shrug, that’s your answer about the contractor.
  2. How will you get on and off the roof without breaking tiles? A real answer involves walk boards or a plan, not “carefully.”
  3. What does the flashing detail at my penetrations look like? This is where leaks start and where shortcuts hide.

One more thing worth flagging: attic ventilation. Poor ventilation cooks the underside of a roof from the inside, and the U.S. Department of Energy covers how attic ventilation and insulation work together to manage heat and moisture in your home. Roofers fix the outside. Ventilation problems live on the inside, and they’ll shorten a roof’s life no matter how good the tile is.

What This Looks Like in Real Time

Picture a house with a twenty year old tile roof. Six tiles are cracked near a valley. No leaks yet. The homeowner gets two bids: one to replace the cracked tiles and one to replace the whole roof. Both are “correct” depending on what’s underneath. The honest move is to have someone check the underlayment in that section first, because that single inspection determines which bid is the right one. Skipping it means choosing between overpaying and underpaying, and neither one feels good when the ceiling stains show up.

Tile roofs reward attention and punish neglect, which is the opposite of what most people expect from a material that lasts this long. The upkeep is modest. The consequences of skipping it are not.

So go outside and look up. Count the tiles that don’t sit right. Then call someone qualified before the next rainy season does the inspection for you, because water is a patient contractor and it works for free.


The average July afternoon in Tucson hits triple digits, and your house is a masonry oven by 3 p.m. If you bought a cooling system in a panic during a heat wave, you already know how that story ends. I have watched neighbors sign on the dotted line within an hour of a breakdown, and

I have watched two of them replace that same unit four summers later. The difference between a system that lasts fifteen seasons and one that limps through six rarely comes down to brand loyalty. It comes down to three decisions you can make before anyone knocks on your door: sizing, timing, and the installer you let through the gate.

This is the version of the conversation I wish someone had with me. Sizing gets covered first because it is where most of the money leaks out, then timing, then how to read a quote when every proposal has a different number at the bottom.

Why Sizing Beats Brand Every Single Time

A bigger unit is not a safer unit. It is a more expensive unit that cools your house unevenly. This trips up almost every homeowner I talk to.

When a system is oversized, it blasts cold air, drops the thermostat reading in a hurry, and shuts off before it has pulled the humidity out of your air. You get a house that feels clammy at 76 degrees while your neighbor’s properly matched unit feels crisp at 78. Cooling equipment is rated by capacity, and matching that capacity to your home is the job of a load calculation, not a catalog chart. The trade association that certifies these design methods, ACCA, publishes the manual contractors are supposed to use, and it accounts for square footage, ceiling height, window orientation, insulation, and how much sun that west facing wall eats every afternoon.

Tucson’s west exposures are brutal, and a house in Vail does not load the same way as a 1950s ranch near Fort Lowell. Here is the pressure test I like. Ask whether the technician will do a room by room load calculation. If the answer involves a rule of thumb like one ton per 500 square feet, that quote is a guess with a price tag. A properly sized system cycles less, holds consistent temperature room to room, and keeps better control of moisture. Get this part right and the rest is bookkeeping.

The Timing Nobody Wants to Hear

You want to buy your air conditioner in February. I know. Nobody wants to spend a Saturday in February thinking about their compressor.

But demand shapes everything. Contractors are slammed from May through September, and summer scheduling means longer waits, faster installs, and less patience for the fiddly details. Spring and fall are slower, which translates into more attention on the work and, often, better pricing.

The U.S. Department of Energy offers sensible guidance on seasonal timing and system selection, and the logic is simple: replacement planning beats replacement reacting. If a contractor tells you they can have a full crew at your house tomorrow in July, ask them where that crew came from and whether they will still be the same people on install day.

If your unit dies in July anyway, you are not doomed. You are just negotiating from a weaker seat. Know that going in, get everything in writing, and don’t rush the load calculation no matter how hot it is inside.

What a Good Quote Actually Looks Like

Three bids, three different totals, and nobody used the same line items. Welcome to HVAC.

A useful proposal answers these questions without you having to ask:

  • What is the exact model number, and what is its efficiency rating?
  • Was a load calculation performed, and will you get a copy?
  • What happens to the existing line set, pad, and disconnect?
  • Does the price cover permits, haul away, and a thermostat swap?
  • What is the labor warranty length, separate from the manufacturer’s parts warranty?
  • Who shows up on install day, employees or a rotating cast of subcontractors?

Two of those matter more than the rest. The labor warranty tells you how confident the company is in its own work, and the permit question tells you whether the job will be inspected. Skipped permits show up later as resale headaches.

Choosing an Installer Without Getting Burned

Licensing, insurance, and bonding are not paperwork theater. Call the state and confirm all three, and read the license number off the written proposal rather than from a truck wrap.

Then look for signs of stability. A company with a local address, a service history longer than a decade, and technicians who have been with them a while is a different animal than a one truck operation that appeared last spring. Longevity matters more in the desert than almost anywhere because desert duty cycles are savage. Systems here run from April into October, and a unit that would coast through a decade in a mild climate gets tested to its limit in half that time. The

U.S. Environmental Protection Agency maintains resources on refrigerant handling and certification, and any technician working with refrigerant should hold the credentials to do it legally. Ask to see them. A good crew will not blink. If you want the full picture on what installation, replacement, and follow up service look like in one place, AC installation in Tucson AZ lays out the scope of what a local provider typically handles, from load calculations through ductless mini split options. It is also a useful checklist for comparing whatever proposals are sitting on your kitchen table.

My Monsoon Week Framework

This is the routine I run every year in the third week of June, and it has saved me twice. I call it Monsoon Week because once the storms hit, nobody can get a technician out for love or money.

Day one: Replace the filter. Write the date on the new one with a marker, and note it in your phone. Filters are the cheapest insurance you own.

Day two: Stand outside at 2 p.m. and listen. A strained compressor has a note you can hear once you know it, and a rattling condenser fan is a part on borrowed time.

Day three: Run the math on your electric bill against last June. A creeping increase with no change in habits usually points to a system working harder than it should.

Day four: Walk the house with your hand at every supply register. Uneven airflow is a duct problem, and duct problems get worse when the attic turns into a furnace.

Four days, no special tools, and you catch small problems while they are still small. The January version is easy. The July version is a $200 service call or worse.

The Only Two Questions That Matter

Will this system be correctly sized for this specific house, and will the people installing it still be in business when something goes wrong? Everything else is brand marketing and finance terms.

Plenty of homeowners go the other direction. They buy the loudest brand name on the truck and skip the load calculation because it sounds like a formality. That trade usually turns out badly, and it turns out badly in August, which is the worst possible month to learn a lesson about your air conditioner.

Get your quotes before the heat arrives. Ask the uncomfortable questions, get the load calculation in writing, and confirm the license before you sign anything. Then file the paperwork somewhere you will actually find it, because in five years when you sell the house, the buyer is going to ask about that system, and you will want to hand them a folder instead of a shrug.

When someone is standing in an inch of cold water next to the furnace, they want one thing, and that is for the water to be gone. Yet the route the water took matters more than how deep it is. Anyone dealing with basement flooding in St Paul will notice that a good restoration crew, like the family owned team working out of County Road C West since 2009, starts with the same question before anything else. They offer a free assessment on water losses, handle the back and forth with insurance carriers, and usually reach a home within two to four hours. Even with that kind of speed, the first job is figuring out where the water came in.

The answer decides three things. It decides how contaminated the water is, how much of the basement has to be removed rather than dried, and who ends up paying for it. Most basements in the city have four doors that water can use, and each one leads to a very different outcome.

Up Through the Floor Drain

Water rising from a floor drain or bubbling out of a basement toilet usually means a sewer backup. That is the worst door of the four, because the water is treated as Category 3, the restoration industry’s term for grossly contaminated water. Carpet, pad, insulation and the lower portion of drywall that touched it are usually cut out and thrown away instead of dried.

In much of St. Paul, the cause sits under the front yard. Older homes often have clay tile sewer laterals, and the roots from boulevard trees find every joint. The city places that pipe squarely on the homeowner. According to the City of Saint Paul’s sewer guidance, property owners are responsible for their private sewer service all the way to the point where it connects with the city main. The city does offer a sewer assessment program that spreads repair costs over 20 years at a low interest rate, along with a deferred emergency loan for low income households.

Insurance is the second surprise. Many standard homeowners policies leave out sewer backup unless a separate endorsement was added, so it is worth checking that page of the policy before a storm.

In Through the Walls and Floor

A damp line along the bottom of a wall, wet mortar joints, or water seeping up through a crack in the slab points to groundwater. Thousands of St. Paul homes sit on block, limestone or fieldstone foundations built long before modern drain tile and waterproofing. When the soil around them gets saturated during a spring thaw or after a long rainy stretch, pressure pushes water through every weak spot.

Sump pump failures belong here too. A pump that quits during a summer power outage, or one with a stuck float switch, lets groundwater rise in the pit and spill across the floor. The water starts fairly clean but picks up soil and debris on the way in, so it usually lands in Category 2. Gradual seepage is commonly excluded from coverage, while a sudden pump failure may only be covered with a water backup endorsement.

Down Through a Window Well or Doorway

Surface water takes the most visible route. During a hard summer downpour, window wells can fill like buckets if their drains are clogged with leaves, and the glass eventually gives way or leaks around the frame. Downspouts that dump right next to the foundation, patios that slope toward the house and walkout doors at the bottom of a hill all invite water inside.

The clues are mud, leaves and grit on the floor beneath a window. In insurance language, water that flows over the ground and into a home is generally considered flood, which standard homeowners policies typically exclude. Coverage for it usually comes through a separate flood policy, such as one from the National Flood Insurance Program, and relatively few Twin Cities homeowners carry one unless their lender required it.

From Somewhere Inside the House

The fourth door is the one people overlook because it never touches the outside. A burst washing machine hose, a leaking water heater, a failed water softener or a supply line that froze along an exterior wall can all fill a basement. This water starts as Category 1, the cleanest classification, and sudden accidental leaks like these are the type most often covered by a homeowners policy. A slow drip that went unnoticed for months is a different story, since long term leaks are commonly excluded.

Four Doors Side by Side

Where it came in Usual water category What often applies
Floor drain or toilet Category 3 Sewer backup endorsement
Walls, cracks or sump pit Category 2 Water backup endorsement, seepage often excluded
Window wells or doors Category 2 or 3 Separate flood policy
Plumbing or appliances Category 1 Standard policy if sudden

Every policy is written differently, so this is a starting point for a conversation with an agent rather than a final answer.

Why Waiting Changes the Category

Even clean water does not stay clean. Once it sits on flooring, soaks into drywall and mixes with dust and whatever was stored on the floor, it can shift from Category 1 to Category 2 within a day or two. That same window is roughly when mold starts growing on wet materials. Fast extraction and drying protect the house, but they also keep the cleanup simpler and the claim smaller.

Reading the Clues Before Help Arrives

A few observations made in the first hour help a lot once the crew and the adjuster show up.

  • Note where the water was deepest and whether it was rising from the drain or spreading from a wall or window.
  • Take photos and video of everything before moving boxes or furniture.
  • Stop running water and flushing toilets if the floor drain is involved, since every use adds to the backup.
  • Shut off power to the basement at the panel only if it can be reached without stepping into water.
  • Stay out of sewage and keep children and pets upstairs.

Closing the Door Behind It

Once the basement is dry, the source points straight to the fix. A camera inspection of the sewer lateral and a backwater valve address the floor drain. A battery backup sump pump and a check of the discharge line deal with groundwater. Window well covers, extended downspouts and regrading handle surface water. Braided steel washer hoses and a look at the age of the water heater cover the inside door.

So yes, it matters a great deal how the water got in. Knowing the door is what turns a frightening mess into a clear plan, and it is what keeps the next storm from coming through that same opening.

Every Fall Service Call Is an Opportunity

For many home service companies, fall brings a steady stream of maintenance appointments. HVAC contractors perform furnace tune-ups, plumbers inspect water heaters and winterize plumbing systems, electricians test backup generators, and roofing companies complete seasonal inspections before winter weather arrives.

Many contractors view these appointments as routine service calls, but they represent much more. Every maintenance visit is an opportunity to build trust, educate homeowners, and uncover projects that can generate additional revenue throughout the winter. Companies that grow consistently understand that maintenance isn’t just about preventing problems. It is also one of the best opportunities to create long-term customer relationships and identify future work before emergencies happen.

Educate Instead of Simply Repairing

One of the biggest differences between average contractors and the fastest-growing companies is how they approach maintenance visits. Instead of completing the work and moving on, successful contractors take time to educate homeowners.

A furnace tune-up can become a conversation about indoor air quality, energy efficiency, aging equipment, or smart thermostat upgrades. A plumbing inspection can lead to discussions about water heater replacement, leak prevention, or whole-home water filtration. Roofing inspections may reveal ventilation improvements or areas where preventive repairs could extend the roof’s life.

When homeowners understand their home’s condition and the options available to them, they make better decisions. They also develop greater trust in the contractor who took the time to explain everything clearly instead of simply handing them an invoice.

Look Beyond the Immediate Service

Every maintenance appointment provides an opportunity to evaluate the home as a whole. While the customer may have scheduled a simple inspection, additional needs may not yet be obvious.

An HVAC technician may discover an aging furnace approaching the end of its useful life. A plumber may notice a water heater showing signs of corrosion or outdated shutoff valves that should be replaced. An electrician may identify an overloaded panel or recommend whole-home surge protection before winter storms arrive.

The goal is not to create unnecessary work. It is to identify legitimate opportunities that improve the homeowner’s comfort, safety, and long-term reliability. When you present these recommendations honestly and support them with clear explanations, homeowners appreciate the guidance.

Strong Follow-Up Creates More Opportunities

Not every homeowner is ready to move forward with a larger project during the initial maintenance visit. That does not mean the opportunity has disappeared.

Following up with educational emails, financing information, maintenance reports, or seasonal reminders helps keep the conversation moving. Homeowners often need time to consider larger investments, especially during the holidays.

Companies with consistent follow-up processes frequently convert more maintenance customers into installation and replacement projects because they remain engaged after the initial appointment. Staying connected demonstrates professionalism while keeping your business top of mind.

As Don Marks of Superpath Home Service Marketing often says, “The companies that grow the fastest aren’t always generating more leads. They’re creating more opportunities from the customers they already have.” A thoughtful follow-up strategy helps turn routine service calls into long-term customer relationships.

Use Fall to Build Your Winter Schedule

Winter can be unpredictable for many contractors. Some weeks are filled with emergency calls while others become surprisingly slow. Fall maintenance appointments provide an excellent opportunity to build a more predictable winter schedule.

If homeowners know they will eventually need a furnace replacement, water heater installation, electrical upgrade, or plumbing repair, scheduling those projects before the calendar fills up benefits everyone. Customers avoid emergency breakdowns while contractors create steadier workloads during the colder months.

Planning ahead also improves staffing, inventory management, and overall business operations. Instead of reacting to winter demand, your company enters the season with confirmed work already on the calendar.

Every Customer Relationship Has Long-Term Value

One of the biggest mistakes contractors make is viewing each service call as a single transaction. In reality, every homeowner represents years of potential business.

A maintenance customer today may become an installation customer next year. They may refer neighbors, leave positive online reviews, or hire your company for additional services as their home changes over time.

This is why customer experience matters so much during maintenance visits. Clear communication, professional technicians, honest recommendations, and exceptional service create trust that extends far beyond one appointment.

Homeowners remember companies that help them make good decisions, not those that simply sell them products.

Build Winter Revenue Before Winter Arrives

The contractors that finish the year strongest rarely depend only on emergency service calls. They build winter revenue months in advance by maximizing every maintenance appointment.

Each visit creates opportunities to educate homeowners, identify future needs, strengthen relationships, and schedule larger projects before competitors do.

Fall maintenance is about much more than preparing homes for winter. It is about preparing your business for long-term growth. Contractors that approach every service call with that mindset often generate more revenue, create stronger customer loyalty, and enter the winter season with fuller schedules and greater confidence.

Key Takeaways

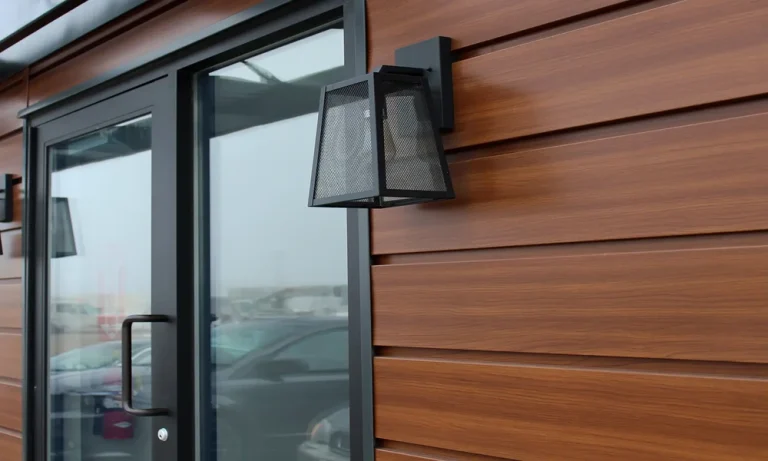
Outdoor faux wood panels serve as a budget-friendly substitute for genuine wood, combining visual allure with lower costs and less need for upkeep.

These panels boast impressive durability and weather resistance, often lasting for decades while requiring significantly less maintenance than natural wood.

The adaptability of faux wood panels enables a wide range of uses, from enhancing patios and defining garden borders to creating decorative fences, all while adding creative flair to outdoor environments at an affordable price.

When choosing faux wood panels, it’s essential to consider key elements such as color, texture, and finish. This ensures a seamless blend with existing design features.

Experts suggest selecting colors and textures that closely resemble those found in natural wood, blending authenticity with the practical advantages of synthetic materials.

To successfully install faux wood panels as a DIY project, adequate preparation and the right tools simplify the process remarkably.

A well-laid plan helps the installation move along without a hitch. The process involves preparation, careful measurement, and secure fastening to achieve high-quality results.

Unveiling the Advantages of Faux Wood Panels in Outdoor Spaces

How Faux Wood Panels Bring Style Without Breaking the Bank

In recent years, the popularity of outdoor faux wood panels has skyrocketed among homeowners eager to blend aesthetic charm with cost-effectiveness. These panels capture the timeless look of wood while bypassing the steep expenses tied to genuine timber. It’s noteworthy that they do this without compromising on elegance or quality. This aspect is precisely why many professionals endorse faux wood panels. They are crafted to emulate the rich textures found in hardwood, imparting a cozy, welcoming atmosphere.

Clients are often delighted to discover the variety of designs available in the faux wood sector. From rustic motifs to sleek, modern styles, the choices are abundant. This design flexibility empowers homeowners to create their dream outdoor spaces without feeling overwhelmed by costs.

With faux wood, the message is clear: There’s no need for style to come at a high price. Plus, the savings on maintenance cannot be overlooked. Unlike natural wood, these panels resist issues like warping, fading, and pest infestations, making them a practical choice for those seeking both aesthetic and functional appeal.

Long-lasting Durability: Why Faux Wood Reigns Supreme

When it comes to exterior materials, durability is a significant factor. While natural wood may captivate certain aesthetic preferences, it often falters when faced with harsh environmental conditions. This is where outdoor faux wood panels excel. Unlike their organic counterparts, these synthetic panels effectively resist rot and decay. Typically, clients enjoy a lifespan measured in decades, minimizing the frequent need for replacements.

Engineered for weather resistance, faux panels maintain their color and visual appeal even when exposed to intense sunlight, heavy rainfall, or frigid temperatures. They’re not just visually appealing; they’re also practical, designed to endure without compromising on aesthetics. This leads to minimal maintenance efforts. Often, a simple wash with a water-dampened sponge is sufficient to keep them looking their best.

“Faux wood panels redefine durability while maintaining an immaculate look, revolutionizing outdoor aesthetics.”

Versatile Applications for Outdoor Faux Wood Panels

Transforming Patios: From Ordinary to Extraordinary

For homeowners looking to revamp their patios, outdoor faux wood panels present an exciting possibility. Incorporating these panels into patio designs can elevate a space from mundane to remarkable in a surprisingly short timeframe. Picture transforming a bland area into a stylish lounge that exudes the charm of reclaimed wood, all while staying within budget.

  • Add Texture: Panels can serve as walls or partitions, crafting more intimate areas.
  • Accent Features: Get creative with paneling for pillars, fire pits, or built-in benches.
  • Design Flairs: Experiment with layered design elements, mixing various textures and patterns.

Clients often feel inspired to explore different layout configurations. The versatility of faux wood invites creative projects that can transform the overall ambiance of an outdoor space, without overwhelming financial implications.

Creative Uses in Gardens and Landscaping

The allure of faux wood panels extends well beyond patios into gardens and landscaping projects. These panels can act as decorative borders, serve as vertical gardens, or function as fencing that complements natural surroundings. But where to begin? Here are some clever applications:

  • Raised Garden Beds: They create stunning visuals while preserving soil quality.
  • Retaining Walls: Faux wood panels can establish stylish barriers that prevent soil erosion.
  • Garden Dividers: These panels can delineate areas for different plants while adding visual interest.

Such applications underscore the incredible adaptability of faux wood, making it a valuable component in a variety of landscaping initiatives.

Choosing the Right Faux Wood Panels for Your Project

Key Factors to Consider for Maximum Aesthetic Appeal

Choosing the ideal faux wood panels isn’t solely about price; it’s about ensuring the right fit for particular projects. Experts recommend being aware of several key factors prior to making selections. Aspects such as color, texture, and finish significantly influence the aesthetic success of the design. A single wrong decision can impact the overall visual effect.

  • Color Coordination: Consider harmony with surrounding elements, from furniture to garden flora.
  • Texture Matching: Choose between smooth finishes for a contemporary appearance or rougher textures for a more rustic vibe.
  • Finish Durability: Verify that the surface finish can withstand outdoor conditions.

Homeowners should take care not to rush through this decision. Instead, investing time in exploring options can yield both lasting satisfaction and stunning aesthetics.

Expert Recommendations: Colors and Textures That Pop

When it comes to selecting vibrant colors and textures, the difference can be significant. Professionals often suggest focusing on textures that replicate natural materials. This results in the illusion of authenticity while enjoying the advantages of synthetic products. Current trends frequently feature deep browns or rich grays, which complement a variety of landscaping themes. As for accents? Whites or creams can add striking contrasts.

Yet, one mustn’t forget personal preference! Choosing elements that resonate with individual style greatly enhances the satisfaction derived from the final result.

Installation Insights: Expert Tips for a Flawless Finish

Essential Tools and Techniques for DIY Installation

For those tackling a DIY project using outdoor faux wood panels, preparation is crucial. Newcomers may feel intimidated by the complexity of the task. Here’s a handy tip: gathering necessary tools ahead of time can simplify the undertaking significantly. Recommended tools often include:

  • Measuring Tape: Accurate measurements help minimize waste.
  • Power Drill: Essential for quick and secure installation.
  • Level: Ensures straight lines and even placements.

Installation techniques are equally important. Experts typically advise starting small. Creating a sample section allows for adjustments before committing to larger areas.

What to Expect During the Installation Process

Installation might seem intimidating, yet it often goes smoothly with careful planning. However, it’s wise to anticipate the unexpected- minor hiccups can arise. Typically, homeowners should prepare for a few key phases during the installation process:

  • Preparation: Clear the area and assemble all necessary materials.
  • Measurement & Cutting: Always double-check cuts before securing.
  • Secure Installation: Use appropriate fasteners to ensure panels are secured safely.

By adhering to these practices, the installation experience can transform into a rewarding journey that leads to beautiful outdoor settings.

FAQ

What makes faux wood panels suitable for varying climates?

Faux wood panels are designed with weather resistance in mind, enabling them to endure a variety of environmental challenges. Extreme weather, whether blazing heat or freezing temperatures, won’t diminish their structural integrity, making them ideal for diverse climates.

Are faux wood panels environmentally friendly?

Numerous faux wood panels are crafted using sustainable methods, thus lessening the carbon footprint compared to traditional wood harvesting. Clients often appreciate knowing that these products offer aesthetic beauty without contributing to deforestation.

How do faux wood panels compare to composite materials?

While both options bring advantages to the table, faux wood panels usually deliver a more authentic wood-like appearance than composites. Typically, they also require less maintenance, making them a favored option for homeowners seeking style without the extra hassle.

Can faux wood panels be painted or stained?

In many cases, faux wood panels can be painted or stained if the original finish allows for such modifications. However, it’s advisable to consult manufacturer guidelines to ensure alterations won’t void warranties or affect overall performance.

How can faux wood panels enhance home value?

Introducing faux wood panels into outdoor areas can significantly improve curb appeal, potentially increasing home value. Prospective buyers often find aesthetic enhancements paired with low maintenance attractive, making properties that showcase these panels more appealing.

What types of projects are ideal for faux wood panels?

Faux wood panels are suitable for numerous projects, including garden borders, decorative fencing, and accent walls. Their versatility allows homeowners to be inventive, from simple installations to elaborate landscape designs, all without straining the budget.

Are there any warranties available for faux wood panels?

Most manufacturers provide warranties for faux wood panels, generally covering issues such as fading or structural damage. Homeowners are encouraged to review warranty information prior to purchase, ensuring they understand coverage periods and conditions.

What maintenance do faux wood panels require?

Maintaining faux wood panels is fairly uncomplicated. Usually, a simple wash with soap and water can keep them looking fresh. Unlike natural wood, they don’t require staining or sealing, allowing homeowners to relish aesthetically pleasing outdoor areas without constant upkeep.

Useful Resources

A new heat pump can improve comfort, energy control, and year-round temperature support at home. Meanwhile, the purchase still needs careful review because equipment choice and project scope affect the final cost. A clear payment plan helps homeowners feel prepared before any contractor visit or system quote.

Homeowners who review financing and rebates for new heat pump systems can see the project cost with greater clarity. Payment plans, rebate support, and credit terms can change the amount due at the start. So, this post will explain practical finance points that matter before a new heat pump purchase.

Start With the Complete Project Estimate

A heat pump estimate should show the full project, not just the equipment price. Labor, electrical updates, indoor unit placement, line sets, and permit needs can affect the total. Clear cost details help homeowners compare options without confusion after the work date is set.

A complete estimate should also explain equipment size, efficiency rating, warranty terms, and any add-on work. The homeowner should ask which items are included and which costs may appear later. This review helps prevent budget gaps before the final agreement moves ahead, especially when the project needs electrical or duct adjustments.

Review Rebates Before Selecting Equipment

Rebates can reduce the net cost when the selected system meets program rules. Some programs may depend on equipment type, efficiency level, home use, or local utility requirements. The rebate review should happen before equipment selection because eligibility can shape the best choice.

A contractor may help identify available rebate paths and required documents. Homeowners should still keep copies of product details, forms, approval letters, and final invoices. Organized records make the rebate process easier after the system has been installed, and they may help resolve questions during program review.

Look Closely at Installment Payment Plans

Installment plans can divide a large project cost into predictable monthly payments. This option can help a household protect cash reserves while still moving forward with needed comfort upgrades. The monthly amount should fit the budget after normal bills, seasonal expenses, and possible service costs are considered.

The plan terms deserve close review before approval. Interest rate, loan length, due date, fees, and early payoff rules all affect the true cost. A fixed payment can support better budget control across the full term and reduce surprise pressure after the system starts service.

Check Promotional Credit Terms Carefully

Some heat pump finance offers include a reduced interest period for qualified buyers. These plans may work well when the balance can be paid within the stated window. The homeowner should read the full credit terms before the first payment is due.

Reliable home comfort companies can help homeowners review financing and rebates for new heat pump systems with clear project details. A dependable service provider should explain eligible offers, payment terms, rebate steps, and equipment requirements before approval. This guidance helps homeowners choose a payment option that fits the system, the home, and the budget.

Consider Comfort Value Across Future Seasons

A heat pump provides both warm and cool air through one central comfort plan. That long-term use should be part of the financial review before purchase. A lower upfront price may have less value if the system does not fit the home well.

Homeowners should think about how long they plan to stay in the property. A long-term owner may place greater value on efficiency, warranty strength, and stable comfort. A short-term owner may focus on property appeal, equipment dependability, and a smooth installation timeline.

A new heat pump purchase deserves a careful look at cost, payment terms, rebate options, and future comfort value. The strongest finance choice should match the household budget and the system that best fits the home. With a clear estimate and the right records, homeowners can make the investment feel easier to manage.